
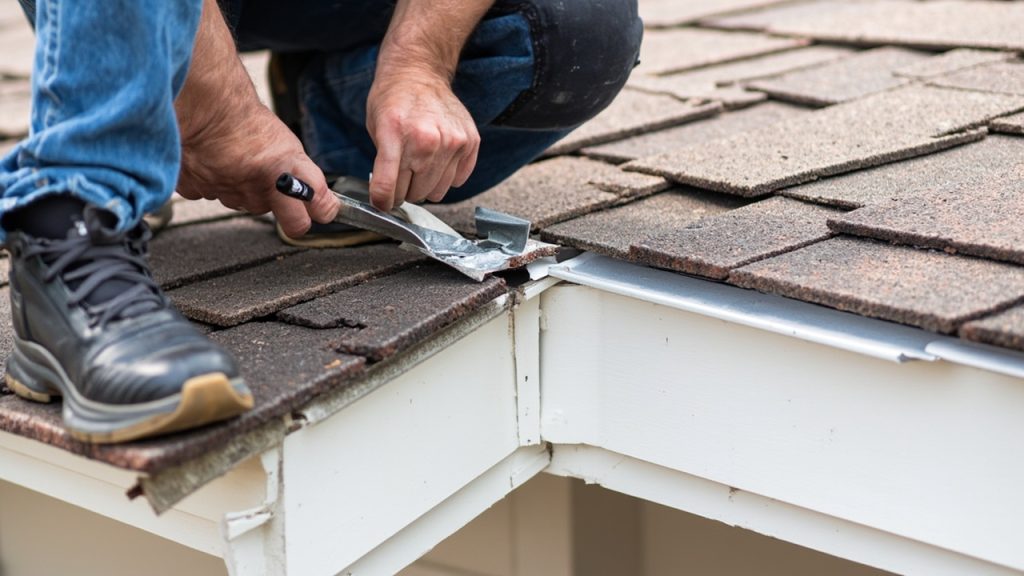
Preventing Leaks in the Transition Between Your Main House and a New Addition in Wickliffe
When you add a new room or wing to your Wickliffe home, the roof transition between old and new structures becomes one of the most vulnerable points for water intrusion. The intersection where different roof planes meet creates natural gaps that can expand with Cleveland’s freeze-thaw cycles. Understanding how these transitions work and why they fail is the first step to keeping your home dry.
Why Roof Transitions Are Vulnerable in Northeast Ohio
The Cleveland area experiences some of the most extreme temperature swings in the Midwest. Your roof transitions expand and contract as temperatures fluctuate between summer heat and winter cold. These movements can break down sealants and pull flashing away from walls. Add in Lake Erie’s heavy snowfall and you have a recipe for leaks.
Ice dams form when melting snow refreezes at the colder edges of your roof. Water backs up behind these ice dams and finds its way into any gap it can. Transition areas are especially prone to this because they often have multiple layers of roofing material meeting at different angles.
Common Types of Roof Transitions in Wickliffe Homes
Most Wickliffe homes built in the 1960s through 1980s feature ranch or split-level designs. When homeowners add new space, they typically create one of these transition types:
- Wall-to-roof intersections where the new addition meets the existing wall
- Pitch changes where a flat or low-slope addition connects to a steeper main roof
- Valley transitions where two roof planes meet and channel water
- Dormer connections that penetrate the main roof surface
Each type requires specific flashing techniques to prevent water from entering your home. The flashing must allow for movement while maintaining a watertight seal.
The Role of Proper Flashing in Transition Protection
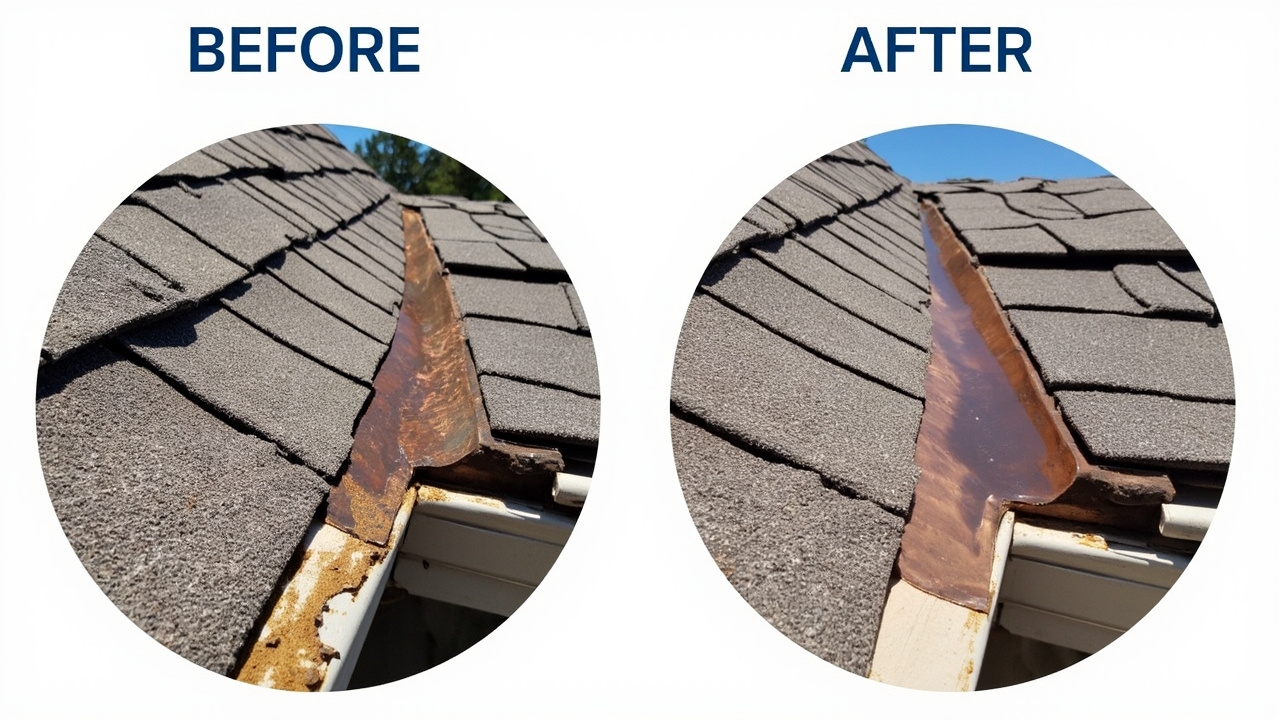
Flashing is the metal or synthetic material that directs water away from transition points. In Cleveland’s climate, galvanized steel or copper flashing typically lasts 20-30 years before corrosion becomes a problem. Aluminum flashing can deteriorate faster due to salt exposure from Lake Erie road treatments.
Step flashing is installed where a roof meets a vertical wall. Each piece of step flashing overlaps the one below it like fish scales. This creates a water-shedding pathway that prevents water from running down the wall and into your home.
Counter-flashing is embedded into the mortar joints of brick or stone walls and folds down over the step flashing. This two-layer system provides redundancy if one layer fails. In Wickliffe’s older neighborhoods, many homes have original flashing that has rusted through or separated from the wall. EPA mold information.
Ice Dam Prevention at Transition Points
Ice dams are particularly problematic at roof transitions because they create concentrated water pressure. When ice builds up in a valley or at a wall intersection, the water has nowhere to go but under your roofing materials.
Proper attic insulation and ventilation are your first line of defense. Heat escaping from your living space melts snow on the roof surface. This meltwater runs down to the colder eaves and freezes, creating the ice dam. Keeping your attic cold prevents this cycle.
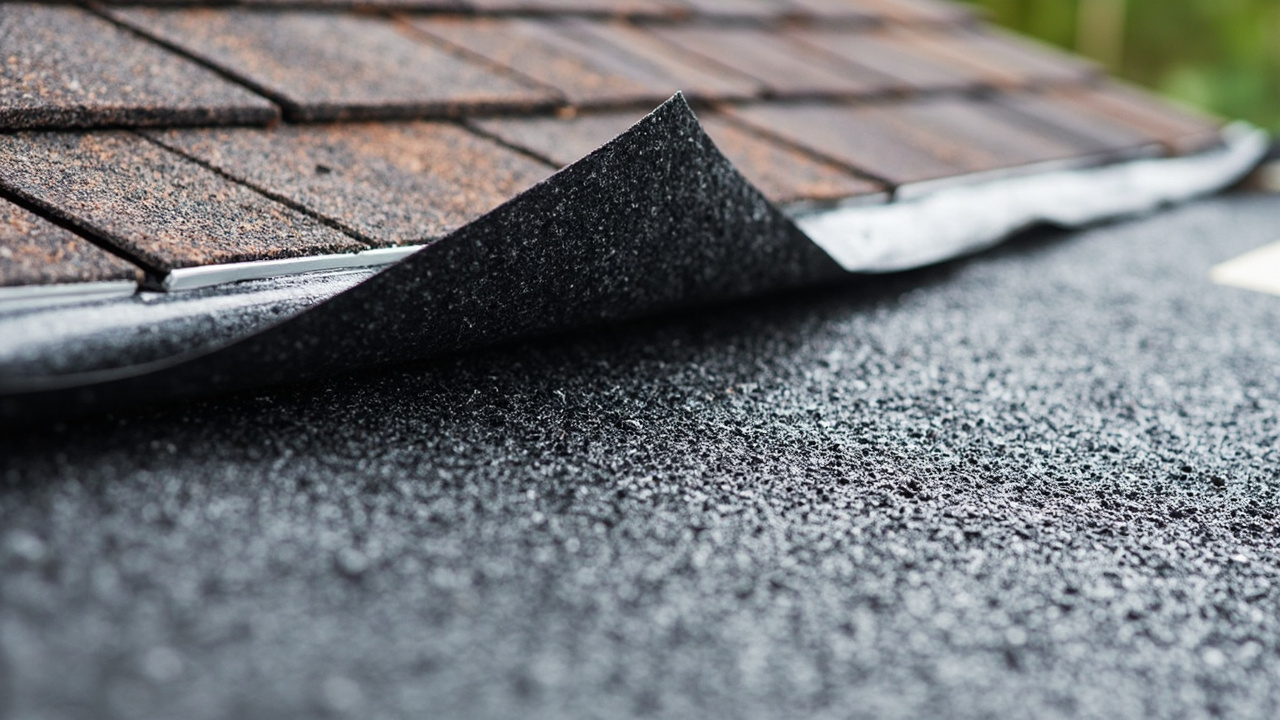
Ice and water shield membrane provides an extra layer of protection under your shingles at transition points. This rubberized asphalt material seals around nails and remains flexible in cold temperatures. Building codes in Cuyahoga County require ice and water shield extending at least 24 inches inside the exterior wall line.
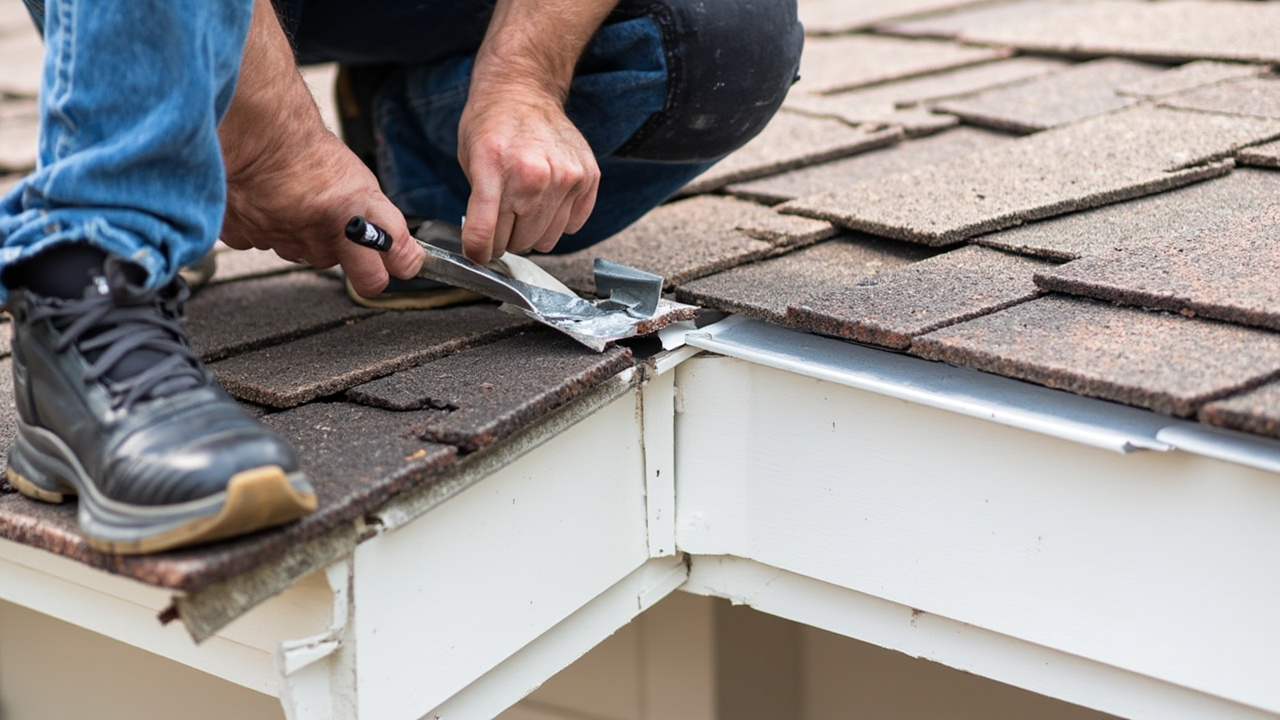
Step-by-Step Transition Repair Process
- Assessment and Documentation
Inspect the transition area for rusted flashing, cracked sealants, and water damage to the underlying structure. Take photos to document the current condition before starting repairs.
- Remove Damaged Materials
Carefully remove shingles, siding, and old flashing from the transition area. Work from top to bottom to avoid damaging surrounding materials that remain in good condition.
- Repair Substrate Damage
Replace any rotted plywood or damaged framing members. Ensure the structural substrate is sound before installing new flashing and underlayment.
- Install Ice and Water Shield
Apply ice and water shield membrane across the entire transition area, extending at least 24 inches up the wall and onto the roof deck. Overlap seams by 6 inches.
- Install New Flashing System
Install step flashing along the wall-to-roof intersection, followed by counter-flashing embedded in the wall. Use galvanized steel or copper for longevity in Cleveland’s climate.
- Apply Sealants and Replace Roofing
Apply polyurethane sealant at all flashing joints and replace shingles or roofing material. Ensure proper overlap and water-shedding patterns.
Signs Your Roof Transition is Failing
Water stains on interior walls near transition points are often the first visible sign of a problem. These stains may appear yellow or brown and can grow larger after heavy rain or snowmelt.
Exterior signs include rusted flashing, missing or damaged shingles at transition points, and cracked or separated sealants. You might notice ice buildup in valleys during winter or water stains on the exterior siding below roof transitions.
Interior signs can include musty odors, peeling paint or wallpaper, and visible mold growth. Water can travel along rafters and appear far from the actual leak source, making diagnosis challenging without professional inspection.
Why DIY Repairs Often Fail at Transition Points
Roof transitions require precise installation techniques that most homeowners lack experience with. Step flashing must overlap correctly, counter-flashing must be properly embedded, and sealants must be applied at the right temperature for proper adhesion.
The consequences of improper installation can be severe. A small gap in flashing can allow gallons of water to enter your home during a heavy rain. Water damage to insulation, drywall, and framing can cost thousands to repair.
Many DIY repairs fail because they address symptoms rather than causes. Simply caulking a gap or replacing a few shingles does not fix underlying issues like inadequate ice and water shield or structural damage to the roof deck.
Materials That Withstand Cleveland’s Climate
Choosing the right materials for your roof transition repair is crucial for long-term performance. In Cleveland’s climate, galvanized steel flashing typically lasts 20-30 years, while copper can last 50+ years. Aluminum flashing may corrode faster due to salt exposure.
For sealants, polyurethane products generally outperform silicone in cold climates. Polyurethane remains flexible at lower temperatures and adheres better to most roofing materials. Silicone can become brittle in extreme cold.
Ice and water shield should be rubberized asphalt with a minimum thickness of 40 mils. Thinner products may not seal properly around nails or withstand Cleveland’s freeze-thaw cycles.
Building Code Requirements in Cuyahoga County
Cuyahoga County building codes require specific protection at roof transitions. Ice and water shield must extend at least 24 inches inside the exterior wall line, measured from the inside of the wall cavity.
Flashing must be corrosion-resistant metal with a minimum thickness of 0.019 inches for galvanized steel. Aluminum flashing must be at least 0.027 inches thick. All flashing must be installed according to manufacturer specifications and local building codes.
Permits are required for most roof repair work that involves structural changes or exceeds 25% of the roof area. Working without permits can result in fines and may void your homeowner’s insurance coverage.
Cost Factors for Professional Transition Repair
Professional transition repair costs vary based on several factors. The extent of damage to underlying structures significantly impacts the total cost. If rafters or roof deck are rotted, replacement costs increase substantially.
Material choices affect both upfront costs and long-term value. Copper flashing costs more initially but can last twice as long as galvanized steel. High-quality ice and water shield adds to material costs but provides better protection.
Accessibility also impacts pricing. Steep roofs or transitions on second stories require additional safety equipment and labor time. Multi-story homes in Wickliffe’s established neighborhoods often have these challenges.
Preventing Future Problems
Regular maintenance can extend the life of your roof transition repairs. Clean gutters and downspouts at least twice yearly to prevent ice dam formation. Remove leaves and debris that can trap moisture against flashing.
Inspect your roof transitions annually, preferably in late fall before winter weather arrives. Look for signs of damage or deterioration and address small issues before they become major problems.
Consider professional inspections every 2-3 years, especially for homes over 15 years old. Professional roofers can identify potential problems that homeowners might miss and recommend preventive maintenance.
When to Call a Professional
Call a professional if you notice water stains on interior walls, see visible damage to flashing, or experience leaks during heavy rain. DIY repairs at transition points often fail because they don’t address underlying structural issues.
Professional inspection is also wise if your home is over 20 years old and has never had the roof transitions evaluated. Many Wickliffe homes have original flashing that has reached the end of its service life.
If you’re planning a home addition, involve a roofing professional early in the design process. Proper transition design during the planning phase can prevent costly repairs later.
Local Expertise Matters
Roofing contractors familiar with Wickliffe and surrounding Cuyahoga County communities understand the specific challenges of our climate. They know which materials perform best in our freeze-thaw cycles and how to install flashing that will withstand Lake Erie’s weather patterns.
Local contractors also understand building code requirements and permit processes specific to our area. They can navigate inspections and ensure your repairs meet all local requirements.
Choosing a contractor with experience in Wickliffe means they understand the architectural styles common to our neighborhoods and can match existing materials for a seamless repair.
Frequently Asked Questions
How long does roof transition repair typically take?
Most transition repairs can be completed in 1-2 days, depending on the extent of damage and weather conditions. Simple flashing replacement might take a few hours, while repairs involving structural damage could take several days.
Can I just caulk the gaps around my roof transition?
Caulking is not a permanent solution for roof transitions. While it might stop minor leaks temporarily, it cannot withstand the movement and weather exposure that proper flashing and underlayment can handle. Caulking typically fails within 1-2 years.
How much does professional transition repair cost in Wickliffe?
Costs vary widely based on damage extent and materials chosen. Simple flashing repairs might start around $500-800, while comprehensive repairs involving structural work can exceed $3,000-5,000. Most homeowners spend $1,500-2,500 for professional transition repair.
Will my homeowner’s insurance cover transition repairs?
Insurance typically covers sudden damage from events like storms but not gradual deterioration from age or lack of maintenance. If your transition failed due to a specific weather event, you might have coverage. Check your policy or consult with your insurance agent.
How can I prevent ice dams at my roof transition?
Proper attic insulation and ventilation are key. Keep your attic cold to prevent snow melting on the roof surface. Also ensure your gutters are clean and consider installing heat cables in problem areas. Professional ice and water shield installation provides the best protection.
How often should roof transitions be inspected?
Inspect your roof transitions annually, preferably in late fall. Also check after major storms or heavy snow events. Professional inspections every 2-3 years can identify problems early before they cause significant damage.
What’s the difference between step flashing and counter-flashing?
Step flashing is the L-shaped metal pieces that install along the roof-to-wall intersection, with each piece overlapping the one below it. Counter-flashing is embedded into the wall and folds down over the step flashing, creating a two-layer protection system.
Can I add a new addition to my home without causing transition problems?
Yes, but it requires proper planning and professional installation. Work with a contractor who understands roof transitions and can design the addition to integrate properly with your existing roof. Proper flashing and underlayment are essential from the start.
How do I know if my transition flashing needs replacement?
Look for rusted or corroded metal, separated sealants, missing or damaged shingles at transition points, and water stains on interior walls. If your home is over 20 years old and has original flashing, replacement is likely needed soon.
What building permits are required for transition repairs?
Most transition repairs require permits in Cuyahoga County, especially if they involve structural changes or exceed 25% of the roof area. Your contractor should handle permit acquisition as part of the repair process.
Protecting your home from roof transition leaks requires understanding the specific challenges of Cleveland’s climate and the proper installation techniques for lasting repairs. Whether you’re dealing with an existing leak or planning a new addition, professional expertise can save you thousands in potential water damage repairs.
Don’t wait for water to damage your walls and ceilings. If you notice signs of transition problems or want to prevent future issues, contact a qualified roofing professional today. Your home deserves protection that lasts through Lake Erie’s toughest weather.
Ready to protect your Wickliffe home from roof transition leaks? Schedule a professional inspection to identify potential problems before they cause expensive damage. Our team understands the unique challenges of Northeast Ohio weather and can recommend the right solutions for your specific situation.
Contact us today to learn more about our roof transition repair services and how we can help keep your home dry and protected for years to come.
{
“@context”: “https://schema.org”,
“@type”: “BlogPosting”,
“headline”: “Preventing Leaks in the Transition Between Your Main House and a New Addition in Wickliffe”,
“description”: “Learn how to prevent roof leaks at the transition between your Wickliffe home and new addition. Expert tips on flashing, ice dams, and Cleveland-specific weather protection.”,
“wordCount”: 2191,
“datePublished”: “2026-05-19T06:16:00.000Z”,
“dateModified”: “2026-05-19T06:16:00.000Z”,
“inLanguage”: “en-US”,
“mainEntityOfPage”: {
“@type”: “WebPage”,
“@id”: “https://alpharoofingcleveland.com”
},
“publisher”: {
“@type”: “LocalBusiness”,
“name”: “Alpha Roofing Cleveland”,
“url”: “https://alpharoofingcleveland.com”
},
“author”: {
“@type”: “Organization”,
“name”: “Alpha Roofing Cleveland”,
“url”: “https://alpharoofingcleveland.com”
},
“image”: {
“@type”: “ImageObject”,
“url”: “https://alpharoofingcleveland.com/wp-content/uploads/2026/03/preventing-leaks-in-the-transition-between-your-ma-1.jpg”
}
}
{
“@context”: “https://schema.org”,
“@type”: “RoofingContractor”,
“name”: “Alpha Roofing Cleveland”,
“url”: “https://alpharoofingcleveland.com”,
“address”: {
“@type”: “PostalAddress”,
“addressLocality”: “Cleveland”
},
“areaServed”: {
“@type”: “City”,
“name”: “Cleveland”
}
}
{
“@context”: “https://schema.org”,
“@type”: “FAQPage”,
“mainEntity”: [
{
“@type”: “Question”,
“name”: “How long does roof transition repair typically take?”,
“acceptedAnswer”: {
“@type”: “Answer”,
“text”: “Most transition repairs can be completed in 1-2 days, depending on the extent of damage and weather conditions. Simple flashing replacement might take a few hours, while repairs involving structural damage could take several days.”
}
},
{
“@type”: “Question”,
“name”: “Can I just caulk the gaps around my roof transition?”,
“acceptedAnswer”: {
“@type”: “Answer”,
“text”: “Caulking is not a permanent solution for roof transitions. While it might stop minor leaks temporarily, it cannot withstand the movement and weather exposure that proper flashing and underlayment can handle. Caulking typically fails within 1-2 years.”
}
},
{
“@type”: “Question”,
“name”: “How much does professional transition repair cost in Wickliffe?”,
“acceptedAnswer”: {
“@type”: “Answer”,
“text”: “Costs vary widely based on damage extent and materials chosen. Simple flashing repairs might start around $500-800, while comprehensive repairs involving structural work can exceed $3,000-5,000. Most homeowners spend $1,500-2,500 for professional transition repair.”
}
},
{
“@type”: “Question”,
“name”: “Will my homeowner’s insurance cover transition repairs?”,
“acceptedAnswer”: {
“@type”: “Answer”,
“text”: “Insurance typically covers sudden damage from events like storms but not gradual deterioration from age or lack of maintenance. If your transition failed due to a specific weather event, you might have coverage. Check your policy or consult with your insurance agent.”
}
},
{
“@type”: “Question”,
“name”: “How can I prevent ice dams at my roof transition?”,
“acceptedAnswer”: {
“@type”: “Answer”,
“text”: “Proper attic insulation and ventilation are key. Keep your attic cold to prevent snow melting on the roof surface. Also ensure your gutters are clean and consider installing heat cables in problem areas. Professional ice and water shield installation provides the best protection.”
}
},
{
“@type”: “Question”,
“name”: “How often should roof transitions be inspected?”,
“acceptedAnswer”: {
“@type”: “Answer”,
“text”: “Inspect your roof transitions annually, preferably in late fall. Also check after major storms or heavy snow events. Professional inspections every 2-3 years can identify problems early before they cause significant damage.”
}
},
{
“@type”: “Question”,
“name”: “What’s the difference between step flashing and counter-flashing?”,
“acceptedAnswer”: {
“@type”: “Answer”,
“text”: “Step flashing is the L-shaped metal pieces that install along the roof-to-wall intersection, with each piece overlapping the one below it. Counter-flashing is embedded into the wall and folds down over the step flashing, creating a two-layer protection system.”
}
},
{
“@type”: “Question”,
“name”: “Can I add a new addition to my home without causing transition problems?”,
“acceptedAnswer”: {
“@type”: “Answer”,
“text”: “Yes, but it requires proper planning and professional installation. Work with a contractor who understands roof transitions and can design the addition to integrate properly with your existing roof. Proper flashing and underlayment are essential from the start.”
}
},
{
“@type”: “Question”,
“name”: “How do I know if my transition flashing needs replacement?”,
“acceptedAnswer”: {
“@type”: “Answer”,
“text”: “Look for rusted or corroded metal, separated sealants, missing or damaged shingles at transition points, and water stains on interior walls. If your home is over 20 years old and has original flashing, replacement is likely needed soon.”
}
},
{
“@type”: “Question”,
“name”: “What building permits are required for transition repairs?”,
“acceptedAnswer”: {
“@type”: “Answer”,
“text”: “Most transition repairs require permits in Cuyahoga County, especially if they involve structural changes or exceed 25% of the roof area. Your contractor should handle permit acquisition as part of the repair process.”
}
}
]
}
{
“@context”: “https://schema.org”,
“@type”: “HowTo”,
“name”: “How to Repair Roof Transitions”,
“step”: [
{
“@type”: “HowToStep”,
“position”: 1,
“name”: “Assessment and Documentation”,
“text”: “Inspect the transition area for rusted flashing, cracked sealants, and water damage to the underlying structure. Take photos to document the current condition before starting repairs.”
},
{
“@type”: “HowToStep”,
“position”: 2,
“name”: “Remove Damaged Materials”,
“text”: “Carefully remove shingles, siding, and old flashing from the transition area. Work from top to bottom to avoid damaging surrounding materials that remain in good condition.”
},
{
“@type”: “HowToStep”,
“position”: 3,
“name”: “Repair Substrate Damage”,
“text”: “Replace any rotted plywood or damaged framing members. Ensure the structural substrate is sound before installing new flashing and underlayment.”
},
{
“@type”: “HowToStep”,
“position”: 4,
“name”: “Install Ice and Water Shield”,
“text”: “Apply ice and water shield membrane across the entire transition area, extending at least 24 inches up the wall and onto the roof deck. Overlap seams by 6 inches.”
},
{
“@type”: “HowToStep”,
“position”: 5,
“name”: “Install New Flashing System”,
“text”: “Install step flashing along the wall-to-roof intersection, followed by counter-flashing embedded in the wall. Use galvanized steel or copper for longevity in Cleveland’s climate.”
},
{
“@type”: “HowToStep”,
“position”: 6,
“name”: “Apply Sealants and Replace Roofing”,
“text”: “Apply polyurethane sealant at all flashing joints and replace shingles or roofing material. Ensure proper overlap and water-shedding patterns.”
}
],
“image”: “https://alpharoofingcleveland.com/wp-content/uploads/2026/03/preventing-leaks-in-the-transition-between-your-ma-1.jpg”
}
{
“@context”: “https://schema.org”,
“@type”: “BreadcrumbList”,
“itemListElement”: [
{
“@type”: “ListItem”,
“position”: 1,
“name”: “Home”,
“item”: “https://alpharoofingcleveland.com”
},
{
“@type”: “ListItem”,
“position”: 2,
“name”: “Blog”,
“item”: “https://alpharoofingcleveland.com/blog”
},
{
“@type”: “ListItem”,
“position”: 3,
“name”: “Preventing Leaks in the Transition Between Your Main House and a New Addition in Wickliffe”
}
]
}
{
“@context”: “https://schema.org”,
“@type”: “Service”,
“serviceType”: “Roofing”,
“provider”: {
“@type”: “LocalBusiness”,
“name”: “Alpha Roofing Cleveland”,
“url”: “https://alpharoofingcleveland.com”
},
“areaServed”: {
“@type”: “City”,
“name”: “Cleveland”
},
“description”: “Learn how to prevent roof leaks at the transition between your Wickliffe home and new addition. Expert tips on flashing, ice dams, and Cleveland-specific weather protection.”
}
For more information, visit FEMA ice dam prevention guide.